

Welcome Fantha Trackers to your latest instalment of Customising Your Fandom. It’s been a while since my last custom but as we have moved into my form of winter sports season, I hope to work on a few more.
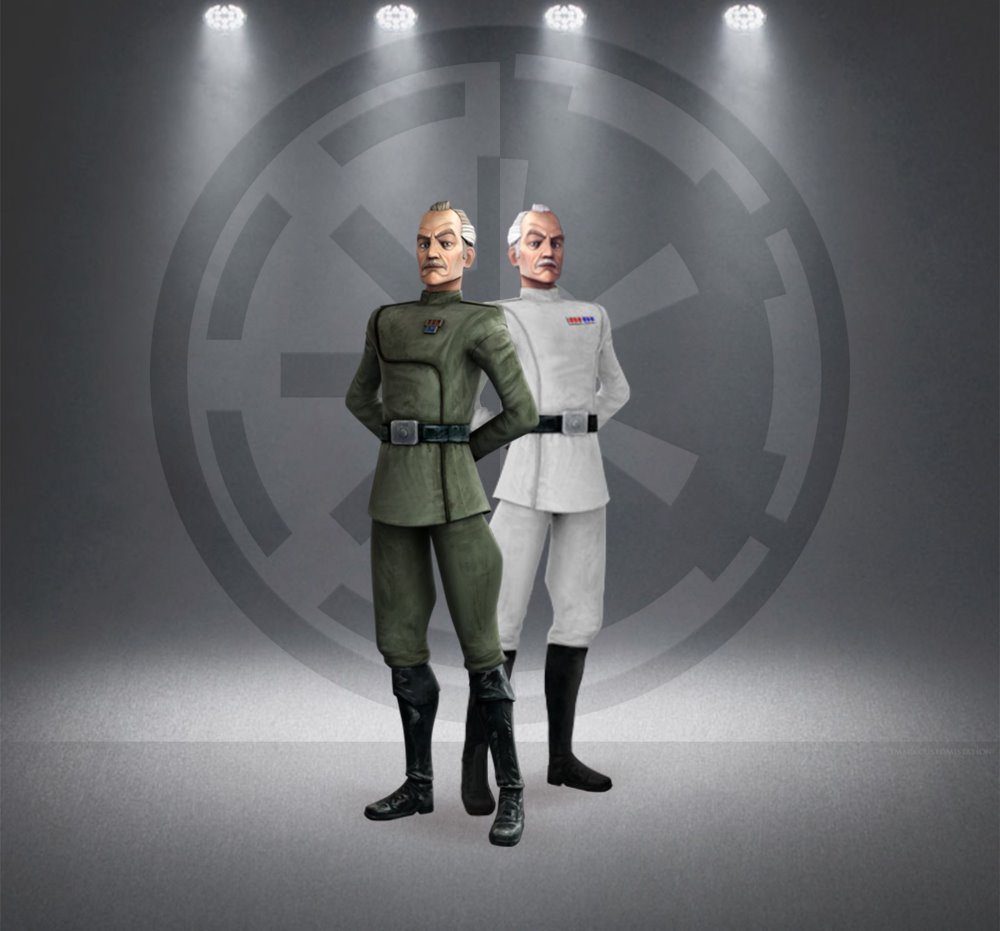
This outing we pay homage to the silver fox or greying Wullf if you prefer. A proud son of Coruscant, Wullf was dedicated to its Galactic role be it Republic or Imperial. Renowned for his intelligence and loyalty, to a fault by some rebels reckoning. Wullf Yularen earned his reputation and rank of Admiral while serving as a Galactic Republic naval officer during the Clone Wars with the Confederacy.
Featuring in both The Clone Wars and Rebels animated series, Wullf Yularen, resplendent in striking white Imperial Service Bureau Deputy Directors uniform, finally appears in live action form during the briefing aboard the Death Star in Episode IV A New Hope.
 Moving onto the custom, this figure was pulled together from a headless vintage Imperial Officer and the loose vintage Mego head of The Black Holes Harry Booth. Disney parts travelling full circle.
The Imperial Officer’s head was missing but had been snapped at the neck peg. The first job was to remove the broken neck peg. Using my pin vice I drilled a few times into the peg to weaken and provide purchase, removing with long snouted pliers. The hole was a little too narrow to house the donor Mego heads peg so I filed around the hole until Harry Booth could fit.
The head sat a little too proudly so I used my mini modelling saw to remove a few millimetres around the circumference of his neck. I sawed around the neck not fully through so I could retain the parts neck joint. I removed the cut parts then filed smooth using needle files. The head was slotted back into the body which looked proportionately better. While the neck peck could pop in and hold securely, the Mego head has a narrowing section in the middle of the neck peg. To remedy this I employed a handy technique I learned from toy restorer Toy Polloi. I whipped plumbers thread around the neck peg narrow section and popped back into the body. Working a charm the head was now sitting well, could rotate and had a nice tight joint feel.
The next job was to address the body’s rank plate. The donor body was a lower ranked officer thus his rank plate was too small. Mixing some Yellow/Grey Milliput Epoxy Putty I shaped a replacement plate which I fitted over the original molded plate which provided a solid anchor for the new part. I allowed the part to dry and harden overnight before using needle files to tidy the next day.
Time to crack open the paints.
Using my Revel white acrylic matt paint I worked around the body applying a thin coat making sure to avoid the parts I wished to remain black. A few more coats added intermittently until the once dark figure sported his distinctive white apparel. Using some dental tools and damp Tamiya arrow headed cotton buds I worked around the body to make sure his gloves, belt and boots were free of any white blemish.
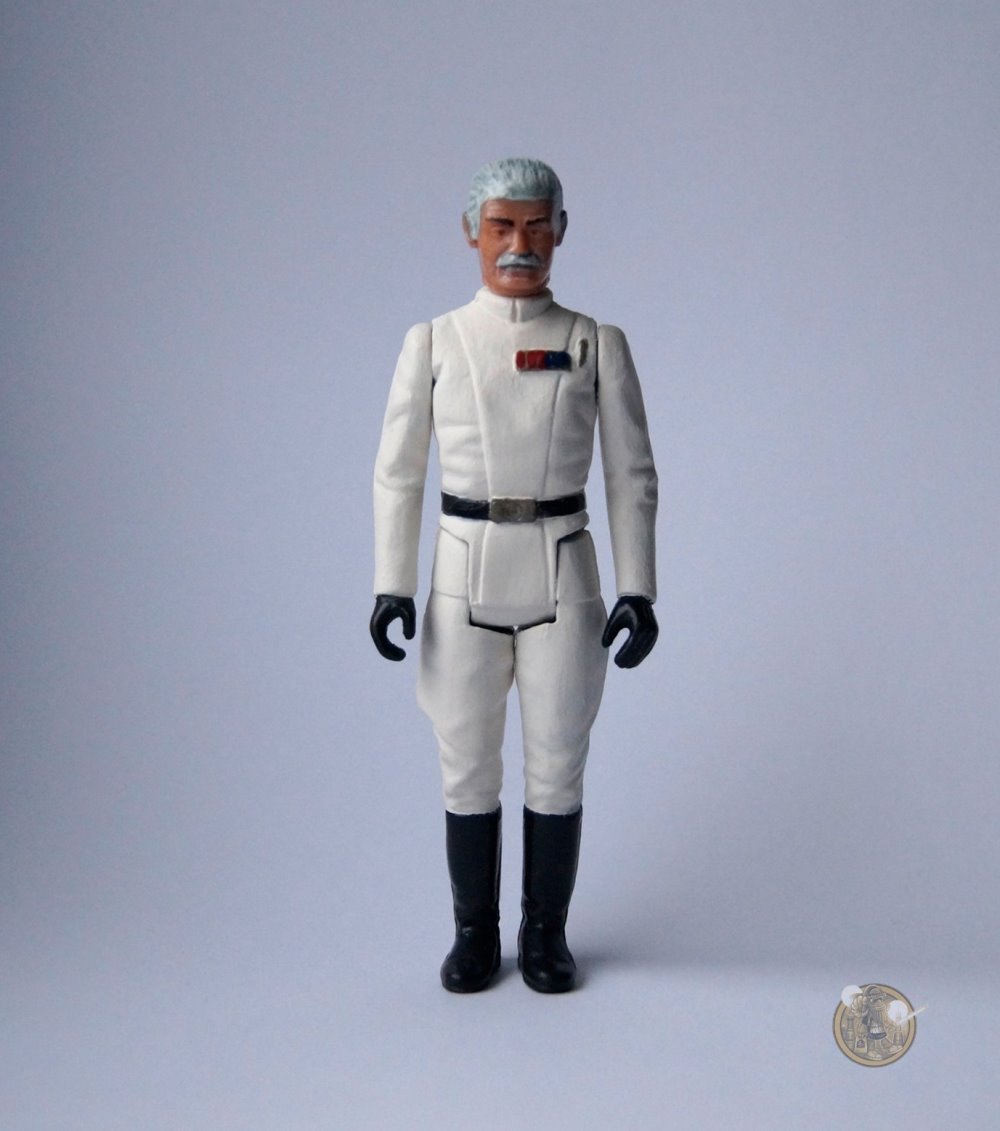 Moving onto the plate and Code Cylinder, I used Tamiya metallic silver acrylic paint with a little added to spruce up his paint worn belt buckle. Using fiery red and dark blue Tamiya acrylic paints I recreated the rank on his name plate. This was very fine work requiring a steady hand and sharp eye, something that proved quite a challenge, so I gave it my best.
With the body mostly complete I turned to the loose head. Using white tack I created a base on a figure stand, popped in a cocktail stick then applied some more white tack to hold the loose head. Hands free and rotational access I worked over the head using the same white acrylic as used for the body. This was applied to both the hair and moustache. After I couple of coats I then run a few light grey washes over the same areas to attain a streak effect.
Using some Revel black matt acrylic I touched up the heads eyebrows to replicate Wullf’s distinctive look.
When all the painting was dry and the head fitted for the last time, the vintage Wullf Yularen custom figure was sprayed with sealant.