

Stepping into a recording studio can be both exciting and daunting for artists of all levels. Being well-prepared, organized, and focused is key to maximizing your recording studio rental experience. You can then be very well on your way to achieving the best possible results and getting the best value for your investment.
When prepping for your session, make sure to have your lyrics memorised and your equipment ready. This helps you stay efficient and avoid unnecessary delays. Planning ahead ensures that every moment in the studio is used effectively, allowing more time for creativity.
Using the right technical setup and collaborating with professionals can elevate the quality of your recordings. A well-organised approach to recording and production will help you create a polished final product that you can be proud of.
Key Takeaways
- Preparation is crucial for a productive studio session.
- Proper technical setup enhances recording quality.
- Collaboration with professionals boosts production outcomes.
Preparation for Your Studio Time
To make the most out of your rental recording studio, it’s essential to be prepared. Focusing on equipment, your goals, and proper budgeting can help ensure a smooth session.
Understanding Studio Equipment and Space
Before heading into the studio, it’s important to learn about the equipment available. Not all studios have the same gear, so knowing what’s on hand can help you plan.
I recommend visiting the studio beforehand. Look at the microphones, instruments, and recording consoles. If you’re unsure about something, ask the studio engineer. They can guide you on how to use the equipment or suggest alternatives. Familiarising yourself with the studio’s layout can also ensure efficient movement and setup during recording.
Establishing Your Recording Goals
Having clear recording goals can make your time in the studio more productive. Think about what you want to achieve in your session. Are you recording vocals, instruments, or both?
Write down the number of songs you want to record. Discuss these goals with the producer beforehand. They can help create a plan to achieve your desired sound. Consider your genre as well, as different music styles may require various recording techniques and setups. Clear goals can keep the session focused and efficient.
Budgeting and Scheduling
Having a clear budget is crucial for a successful recording session. Studio time can be expensive, so plan ahead. Determine how many hours or days you need, and ask for an estimate from the studio.
Scheduling is just as important. Book the studio for the times when you and any other musicians are at your best. Avoid times when you might be tired or distracted. Include extra time in your schedule for setup, breaks, and potential re-recordings.
By managing your budget and schedule, you can maximise productivity and avoid stress.
Technical Setup in the Studio
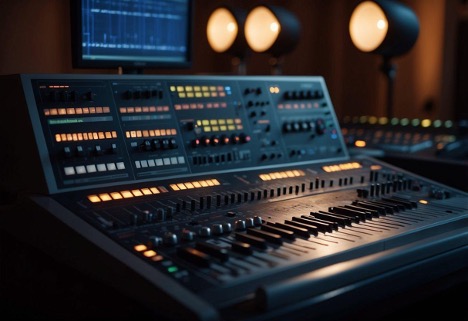
Setting up a rental recording studio involves managing key elements like your digital audio workstation (DAW), preparing your microphones and instruments, and ensuring optimal acoustic conditions. This is essential for achieving high-quality recordings.
Navigating the Digital Audio Workstation
The Digital Audio Workstation (DAW) is the heart of the studio. I ensure that it’s properly installed and configured on the computer. Popular DAWs include Logic Pro, Ableton Live, and Pro Tools.
I make sure all necessary plugins and extensions are installed. It’s important to have a compatible audio interface with proper inputs and outputs. This interface connects the computer to microphones, instruments, and speakers.
A good set of headphones is essential for tracking and editing without external noise. Cables should be well-organised and firmly connected to avoid disruptions.
Microphone and Instrument Setup
Microphone setup requires careful positioning and connections to capture the best sound quality. Typically, I use dynamic microphones for vocals and condenser microphones for instruments. Sturdy mic stands ensure stability.
Each microphone is connected to the audio interface using quality XLR cables. For instruments, direct inputs are available on most audio interfaces.
I check each connection for clarity and ensure that levels are properly set in the DAW. Label cables and connections to prevent confusion during recording.
Achieving Optimal Acoustics
Good acoustics are critical in any recording environment. Acoustic treatment includes using foam panels, bass traps, and diffusers to manage echo and reverberation. Proper placement is crucial for effectiveness.
I assess the room layout and position the monitors and speakers to avoid sound reflections. Utilising soundproofing techniques like heavy curtains and door seals reduces external noise.
Testing the setup with reference tracks helps fine-tune the acoustic environment. This is essential for achieving clear, professional-grade recordings.
Recording and Production Techniques
Focusing on recording and production in a rental recording studio involves capturing high-quality vocals and instruments, working effectively with producers and sound engineers, and enhancing workflow and collaboration. Attention to detail in these areas can significantly impact the final product.
Capturing High-Quality Vocals and Instruments
To get the best vocals, start by choosing the right microphone. I find that a large-diaphragm condenser mic often works well for vocals. Positioning the microphone and using a pop filter can help reduce unwanted sounds.
For instruments like guitars, consider mic placements and types. A dynamic mic close to the amp captures a strong sound. For acoustic guitars, place condenser mics at the sound hole or neck. Experimenting with different angles can produce varied tones.
Recording keyboards can be straightforward. Direct input (DI) often provides clear and clean sound. Using MIDI allows flexibility in post-production, letting you modify the instrument’s sound later.
Working with Producers and Sound Engineers
Clear communication with the producer and sound engineer is vital. I always start by discussing the creative vision for the project. This ensures everyone is on the same page and can work towards the same goals.
During recording sessions, feedback loops are important. Listening to playback and making adjustments helps refine the sound. I also find it useful to give the sound engineer specific notes on what I am aiming for, whether it’s a particular vocal effect or instrument mix.
Collaborating on the mix and master process can enhance the final outcome. Together, we can address issues such as balancing levels, EQ adjustments, and adding effects. Bringing my ideas and trusting the professionals’ expertise leads to a polished product.
Enhancing Your Workflow and Collaboration
Efficiency in the studio saves time and money. Planning is key. I always come prepared with a clear idea of the session’s goals. This includes knowing the song structures, tempos, and any specific sounds I want.
Creating a detailed schedule helps manage the session smoothly. Breaking down tasks into smaller parts, such as tracking vocals in the morning and guitars in the afternoon, keeps the session organized.
Collaboration is more productive when everyone knows their role. I ensure that each team member understands their responsibilities. Regular check-ins and feedback sessions keep the workflow on track. Using tools like shared calendars and project management software can also streamline the process.
Post-Recording Processes
After recording your tracks at a rental studio, the next crucial steps involve editing, mixing, and mastering. These post-recording processes are key to achieving a polished, professional sound. By focusing on important aspects like sound quality and using the right tools, you can ensure your music stands out.
Editing and Mixing Tracks
Editing is where I remove unwanted noises and clean up the tracks. This could involve cutting out mistakes, tightening up timing issues, or correcting pitch problems. I typically use a Digital Audio Workstation(DAW) like Pro Tools or Logic Pro to perform these adjustments.
Once editing is complete, I move on to mixing. This is the process of blending all the individual tracks together. Here, I adjust levels, pan tracks left or right, and apply effects using various plugins. Reverb, equalisation (EQ), and compression are often used to enhance the overall sound quality.
Using a mixing console or an audio interface can improve the mixing process. These tools give better control over the sound. I also frequently reference other professional records to ensure my mix holds up to industry standards.
Mastering and Final Touches
Mastering is the final step before releasing music. It is about making the mix sound as good as possible on all playback systems. I usually increase the volume, enhance the clarity, and make sure every track sounds cohesive.
Adding the finishing touches can involve slight EQ adjustments, further compression for consistency, and limiting to prevent audio peaks. I might also listen through different speakers and headphones to ensure the mastering translates well on all devices.
Some music producers prefer to send their tracks to specialised mastering engineers. This can sometimes lead to a better result as they possess specific expertise and equipment. Whether done in a professional studio or at a home recording studio, mastering is essential for achieving a polished, final product.